You can also watch a video version of this guide here. Use the navigation to skip ahead to section 2, for an installation walkthrough.
Enabling Prism on your Trakkr account
Start by heading to the Prism page in your Trakkr account. Prism is available on all upgraded Trakkr plans. When you open the Prism page for the first time you’ll see a brief explanation of Prism, and be asked to enable it.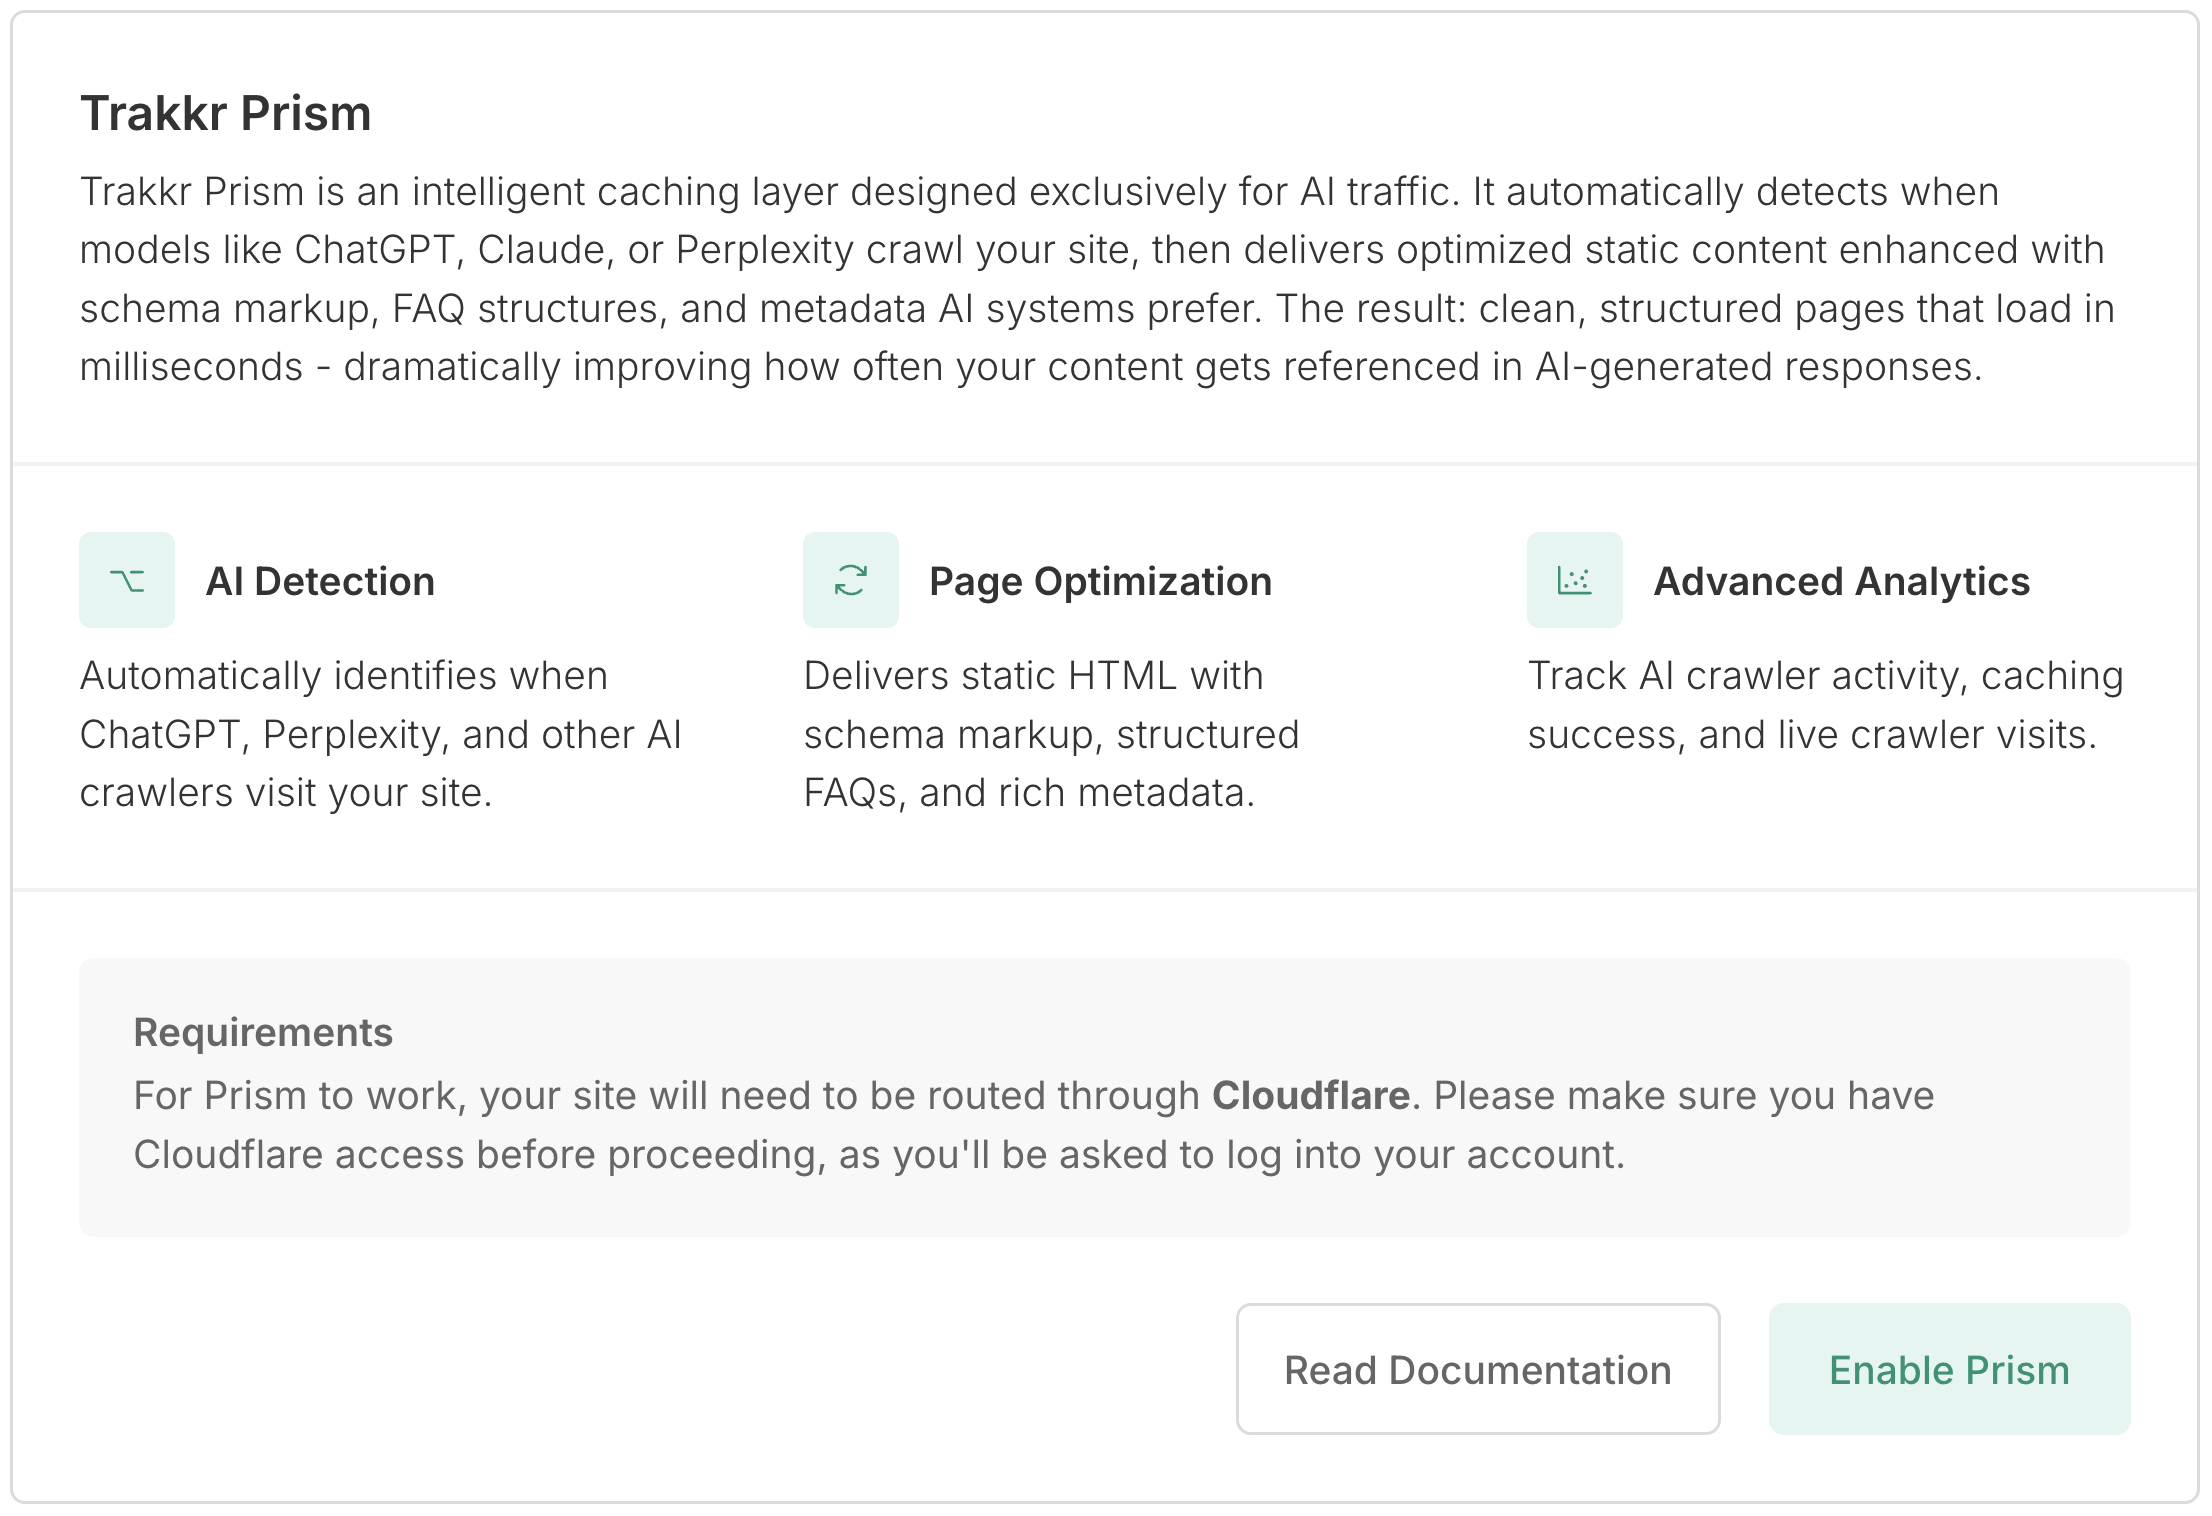
Customising your configuration
You’ll then be asked to confirm the main domain for your site. Enter this as it appears in your browser bar, typically without an https:// prefix (for example, nike.com). Below that, you’ll be able to configure which AI crawlers your Prism is set up to serve optimised pages to. Trakkr offers a default selection highlighted in green, however you can click on each on to change its status (or hover over it for more details).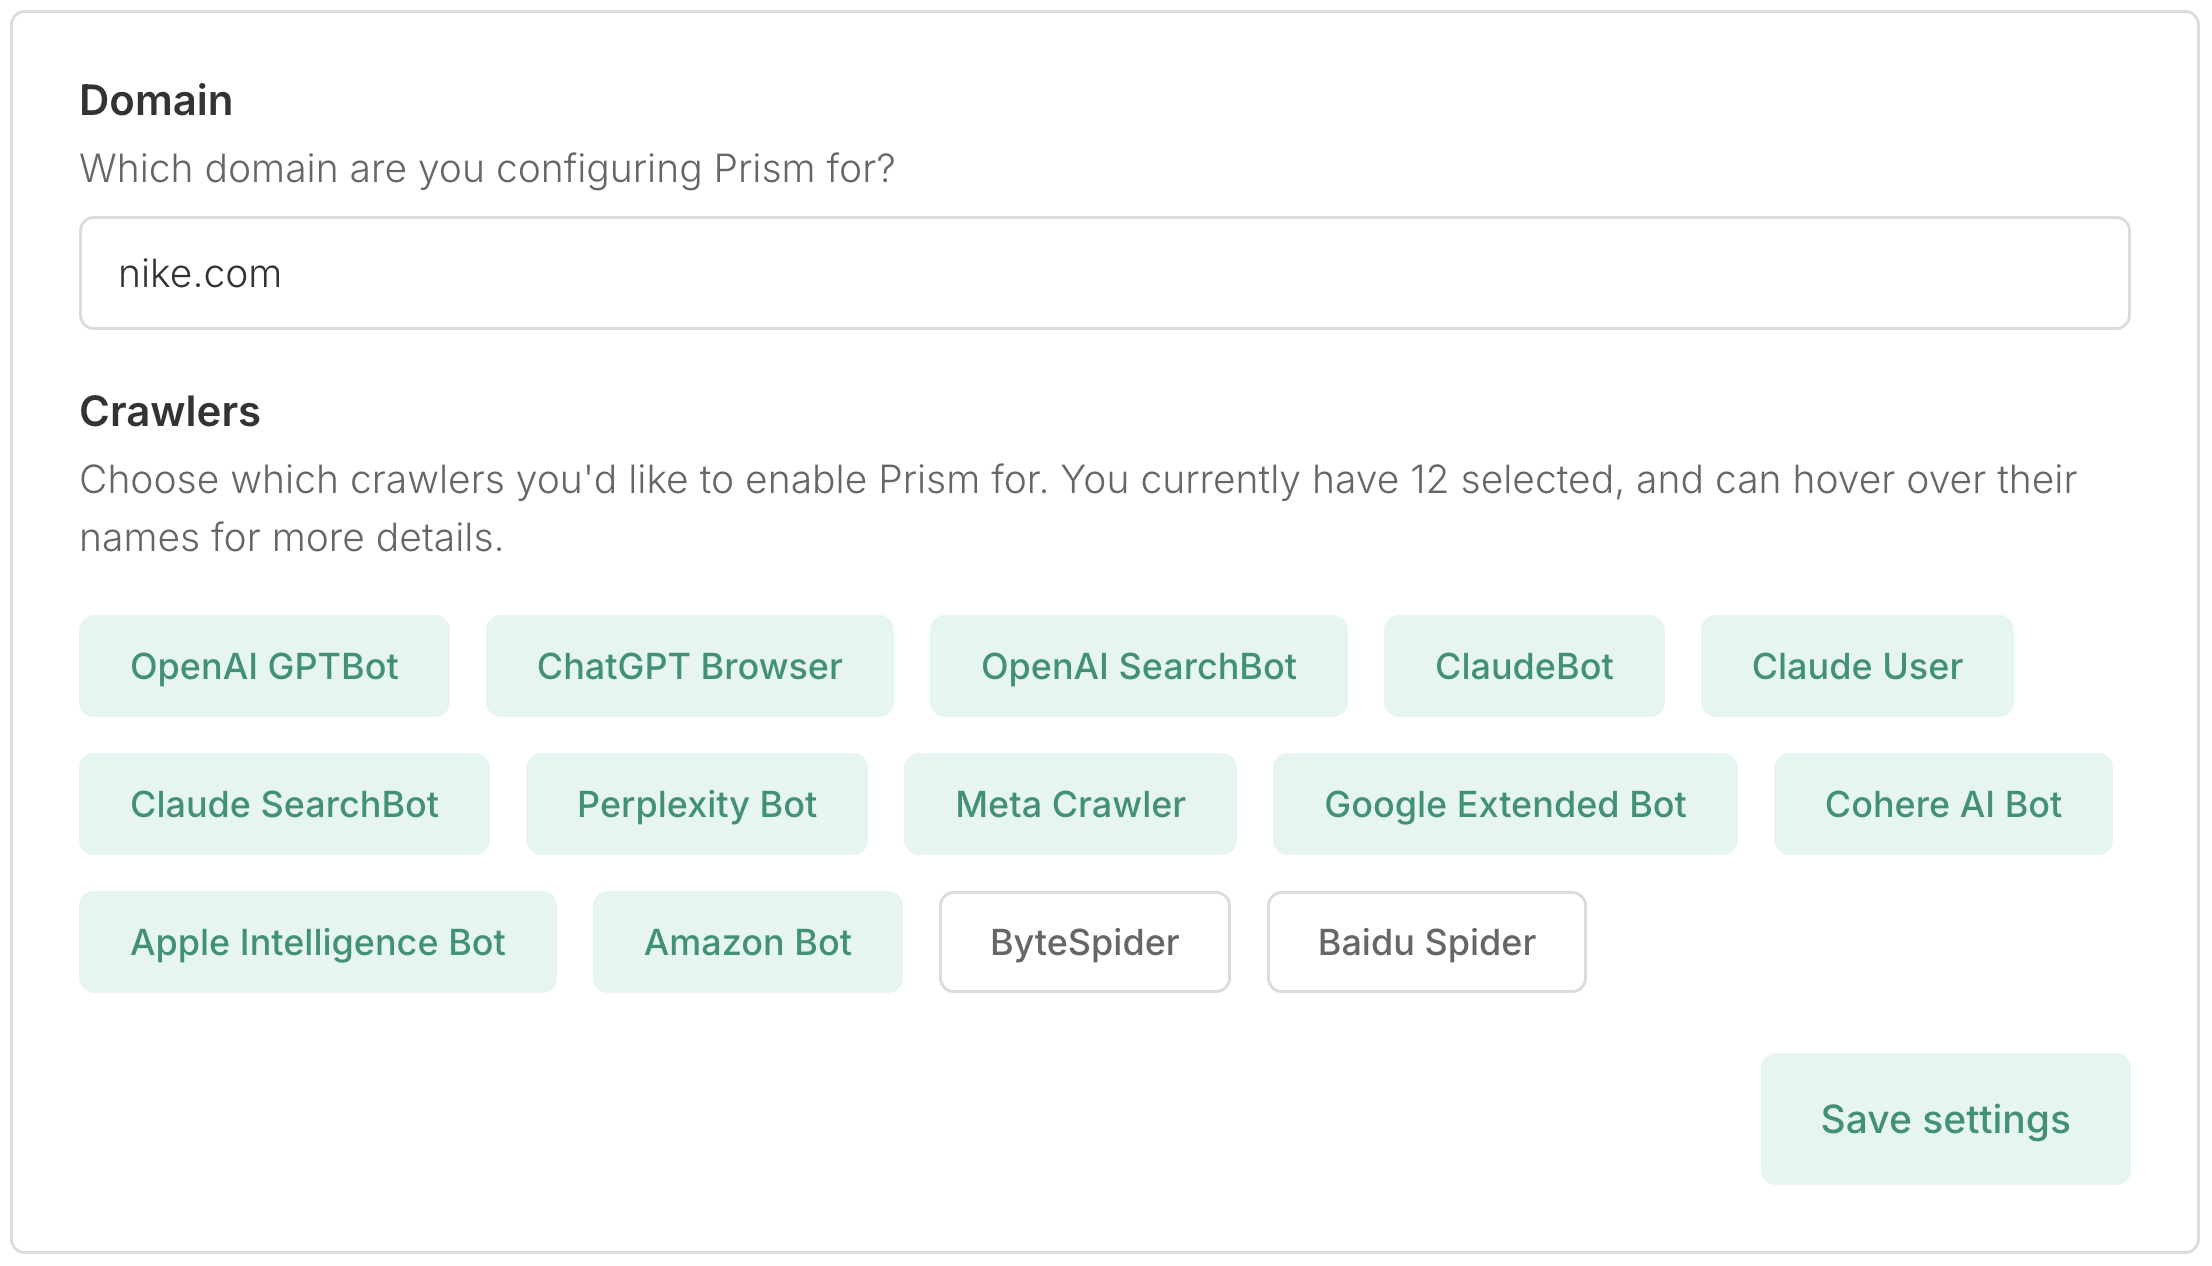
Choosing your features
You’ll then be asked to select which features you’d like enabled. Trakkr recommends keeping all of these enabled (you’ll be able to change this later) but are welcome to toggle off any features. If you simply want Trakkr to pre-render and compress all of your pages, you can turn all of these features off, and Trakkr won’t add anything to your pages.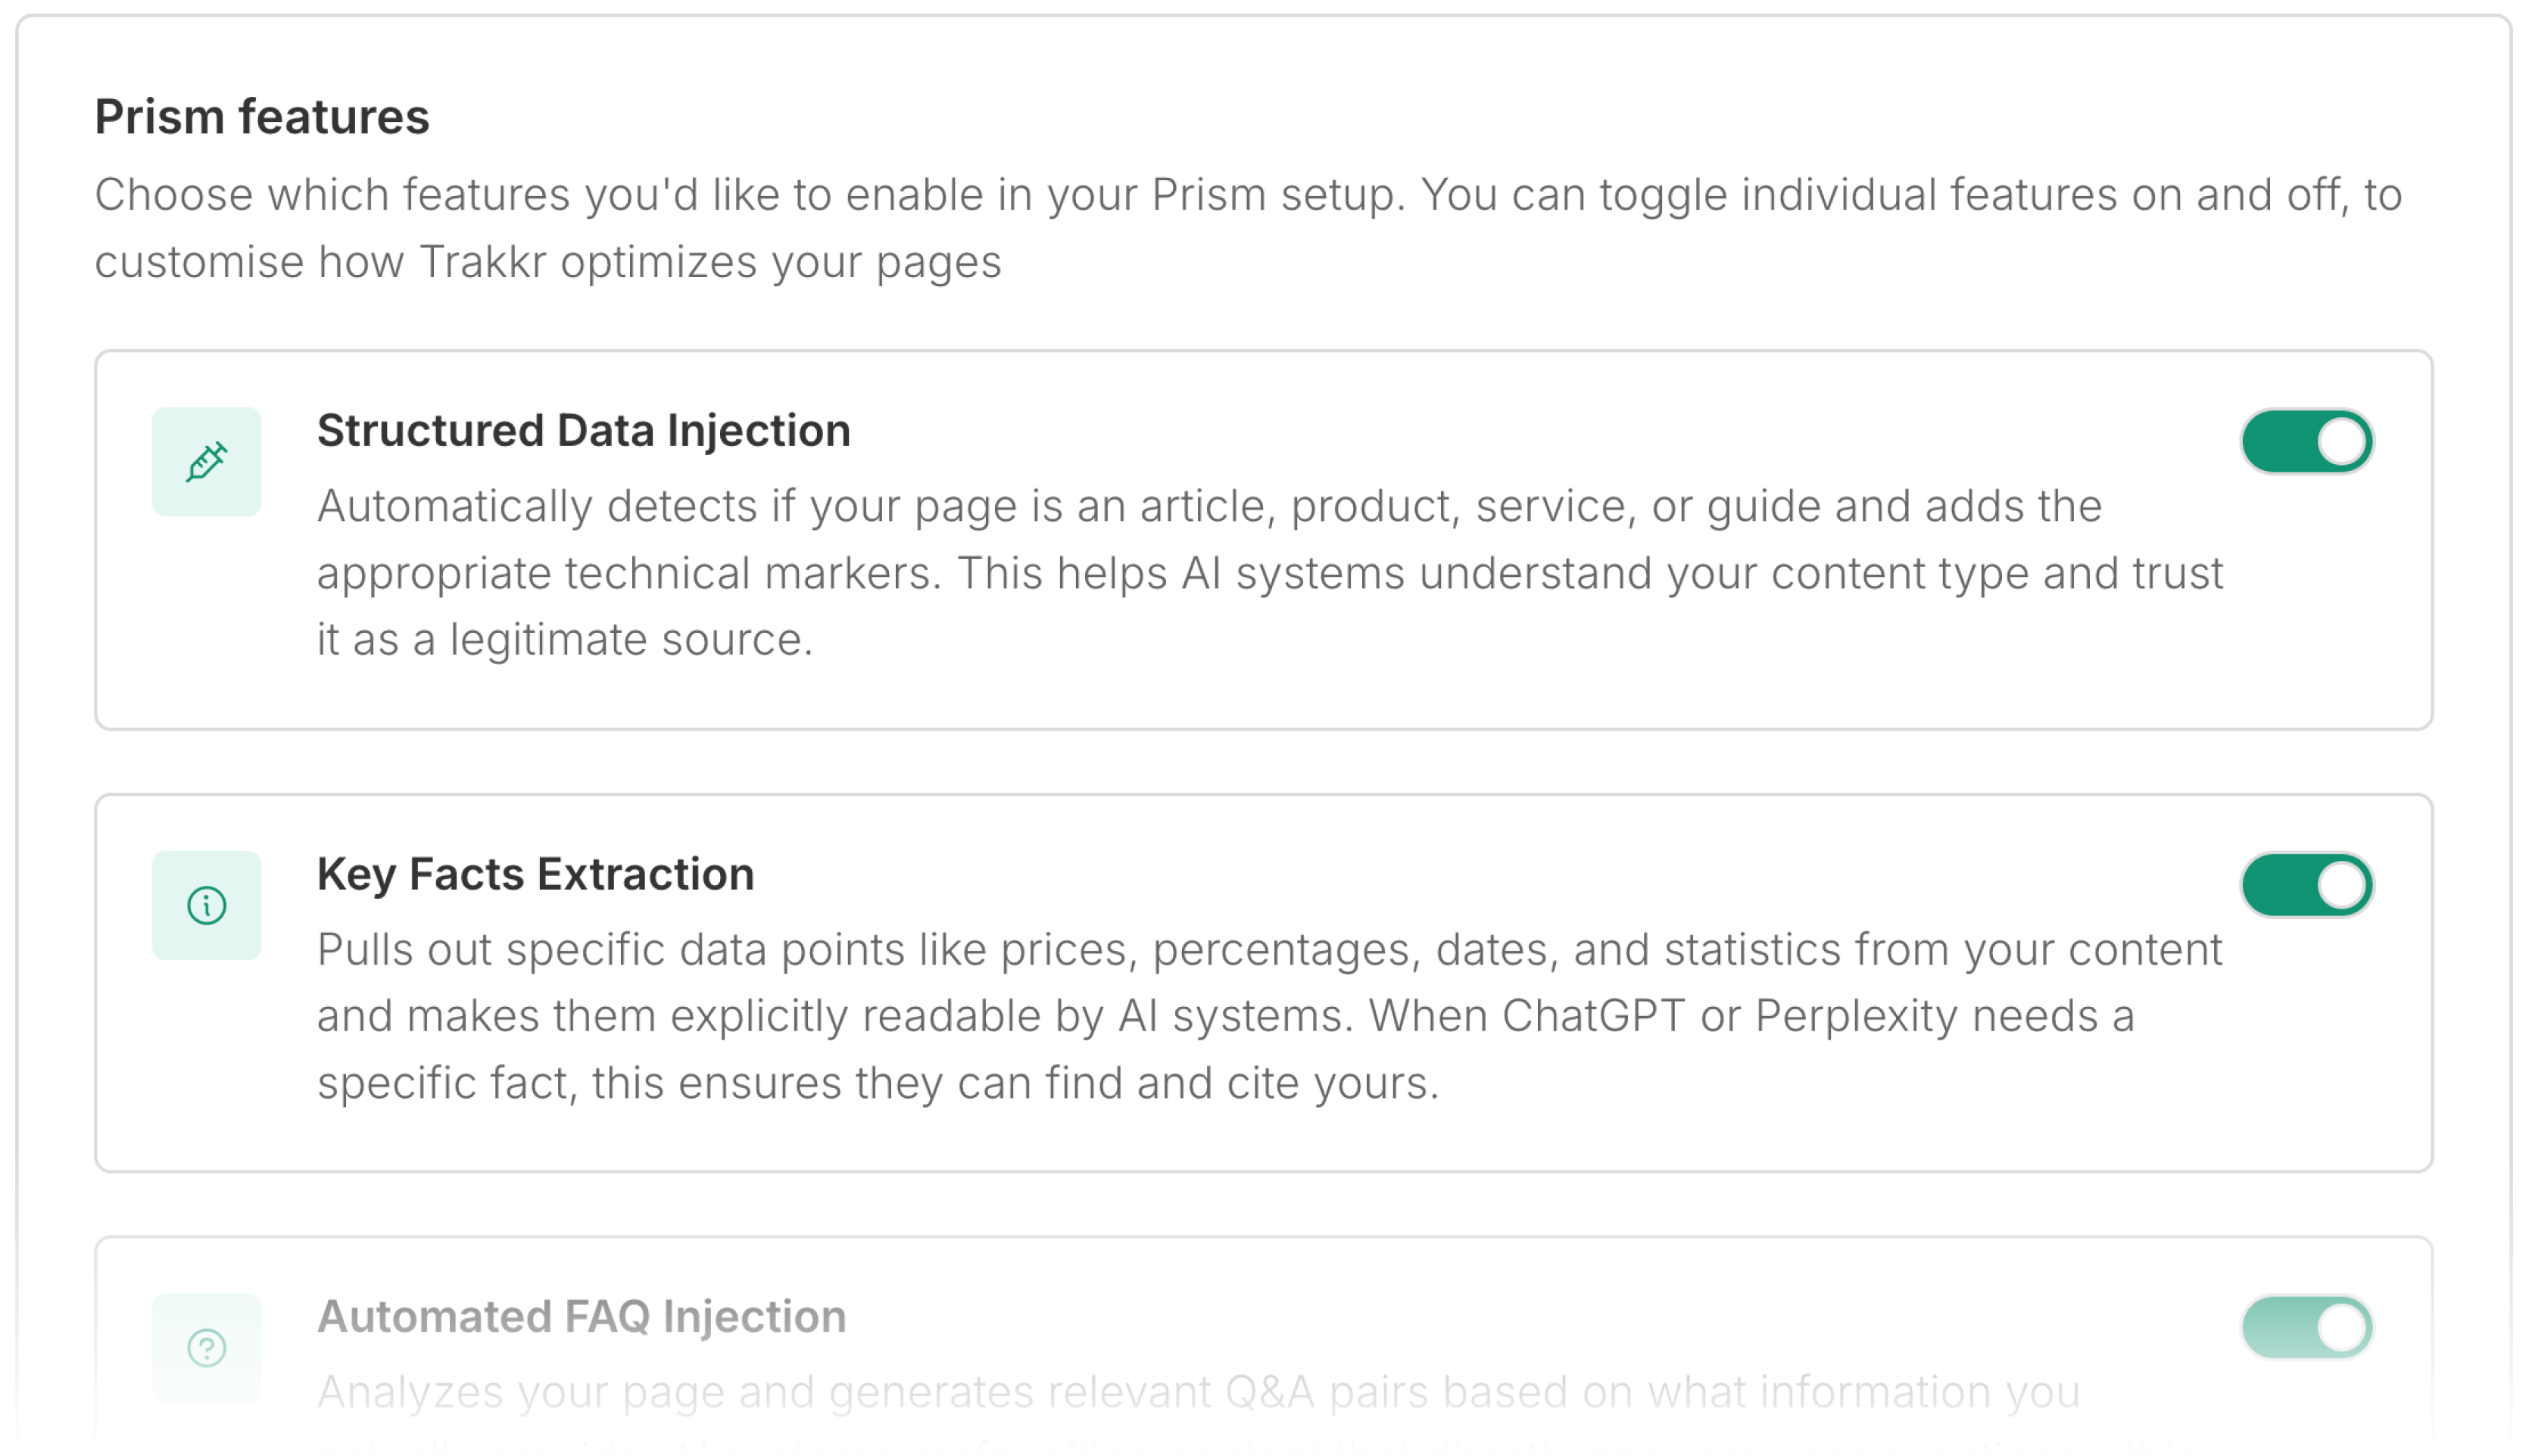
Cloudflare installation
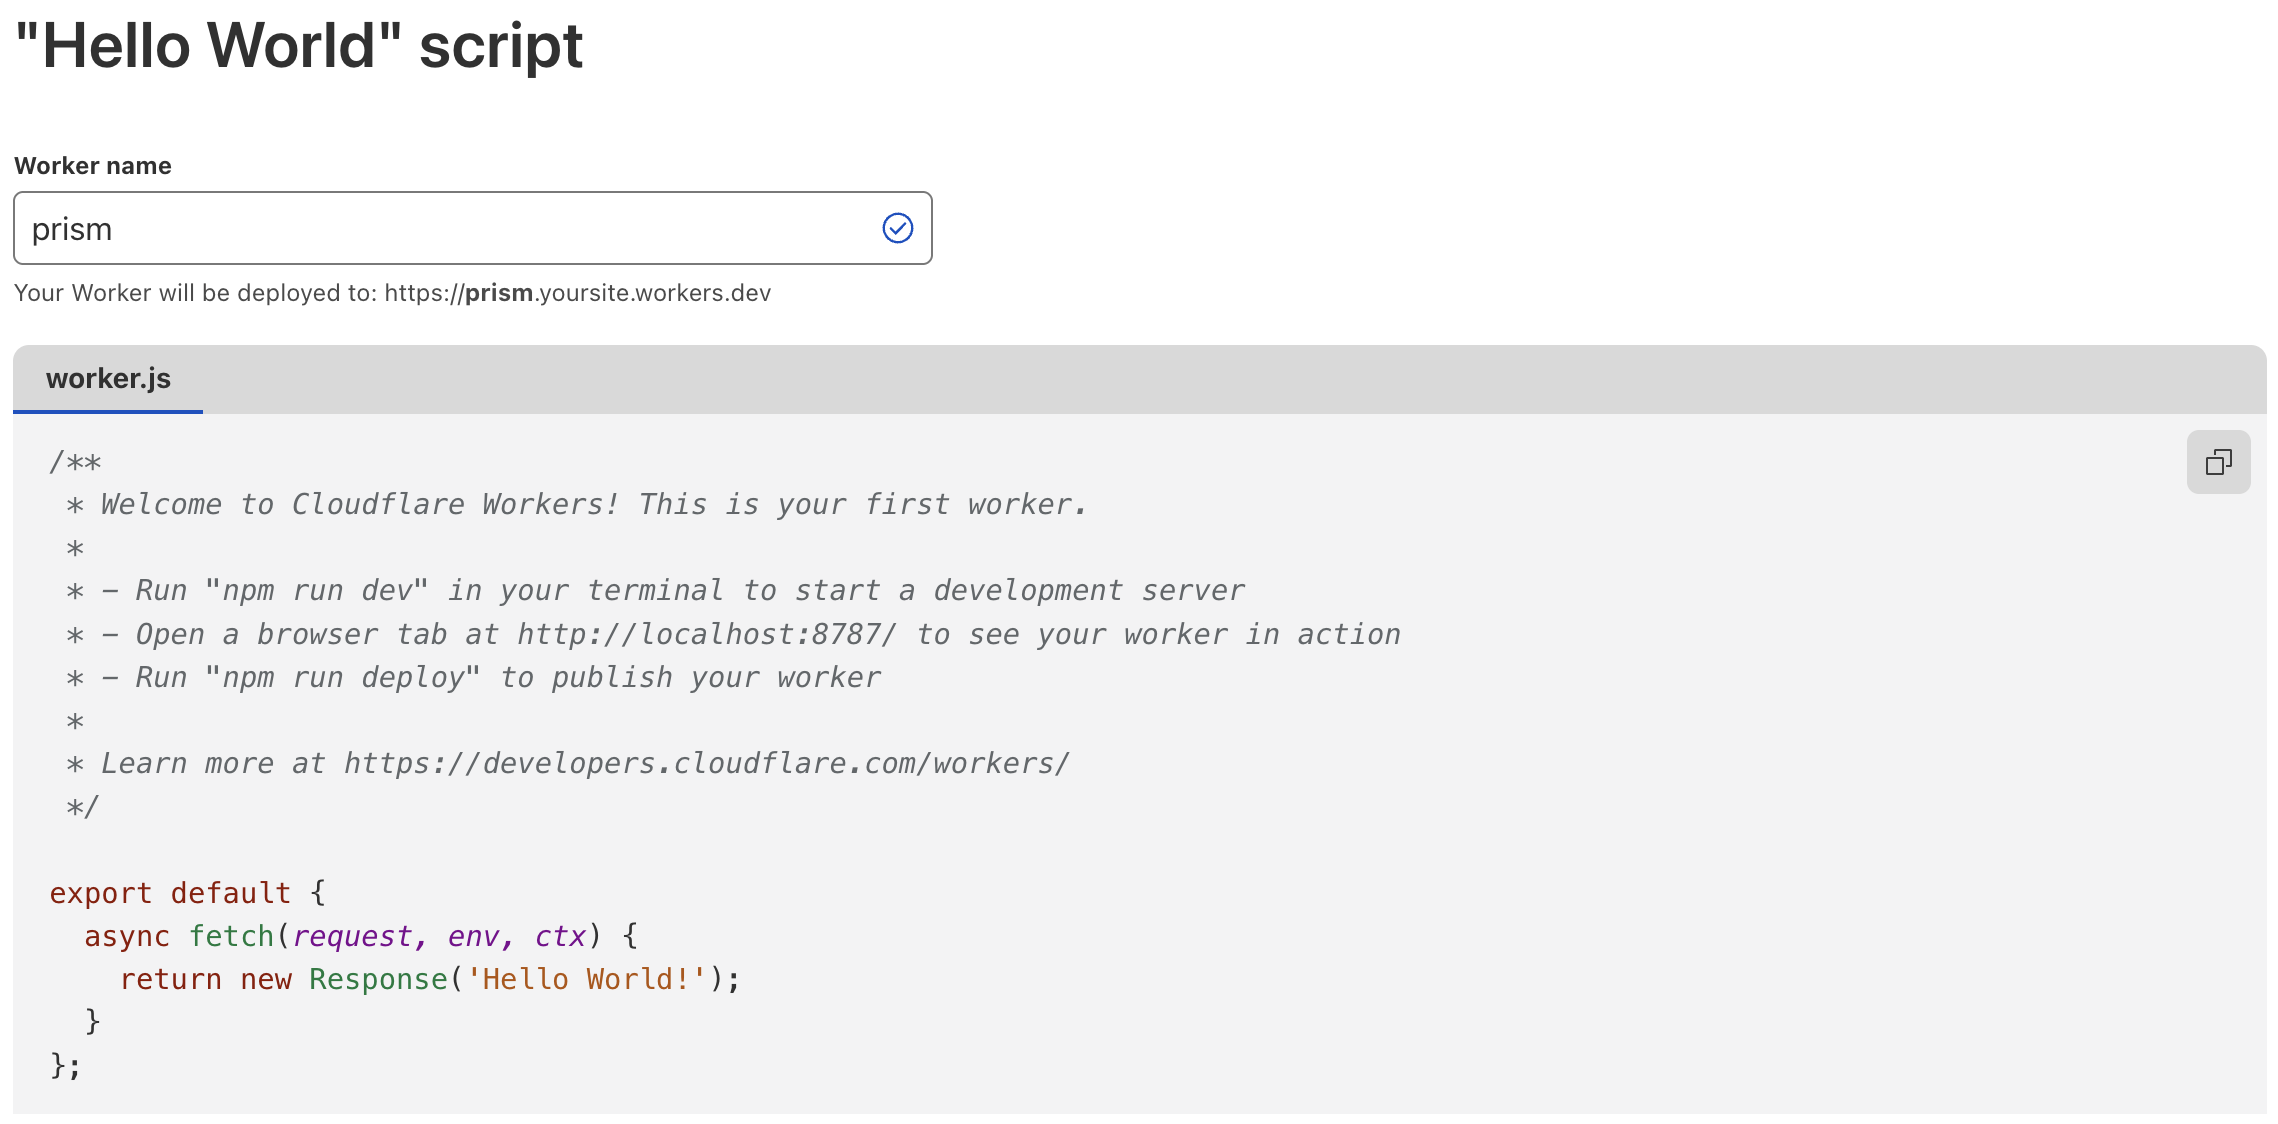
Installing Prism into Cloudflare can look a little bit daunting at first, but it shouldn’t be much more difficult than installing Google Analytics or any other marketing tag!Step 1: Creating a Cloudflare Worker
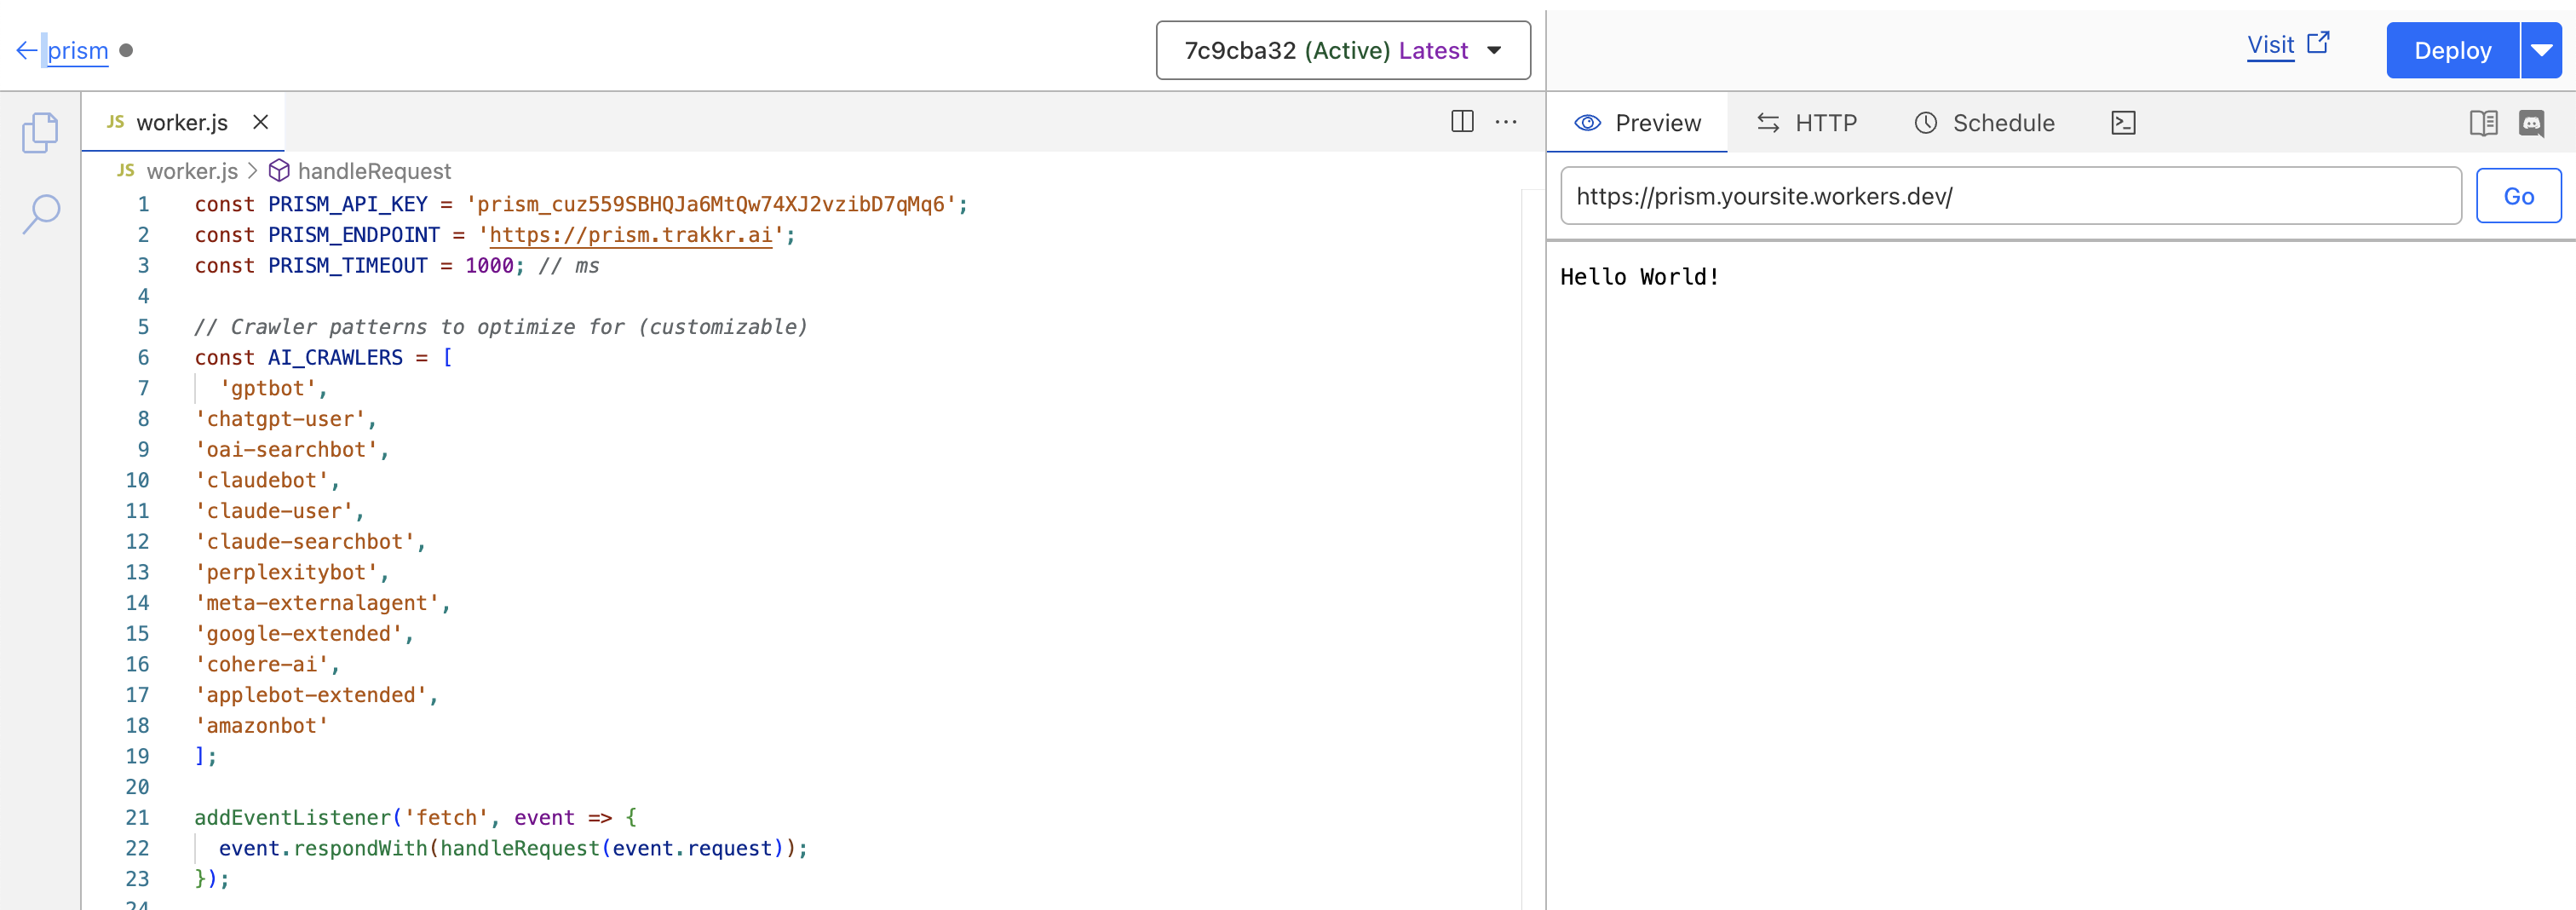
Once you’ve reached the installation tab of the the Prism setup flow, you’ll see a code block. Click Expand to view it in its entirety, and check that the configuration at the top matches what you’d expect based on how you’ve configured Prism in the previous steps. Once everything looks good, click the icon in the top right of the block to copy the code to your clipboard.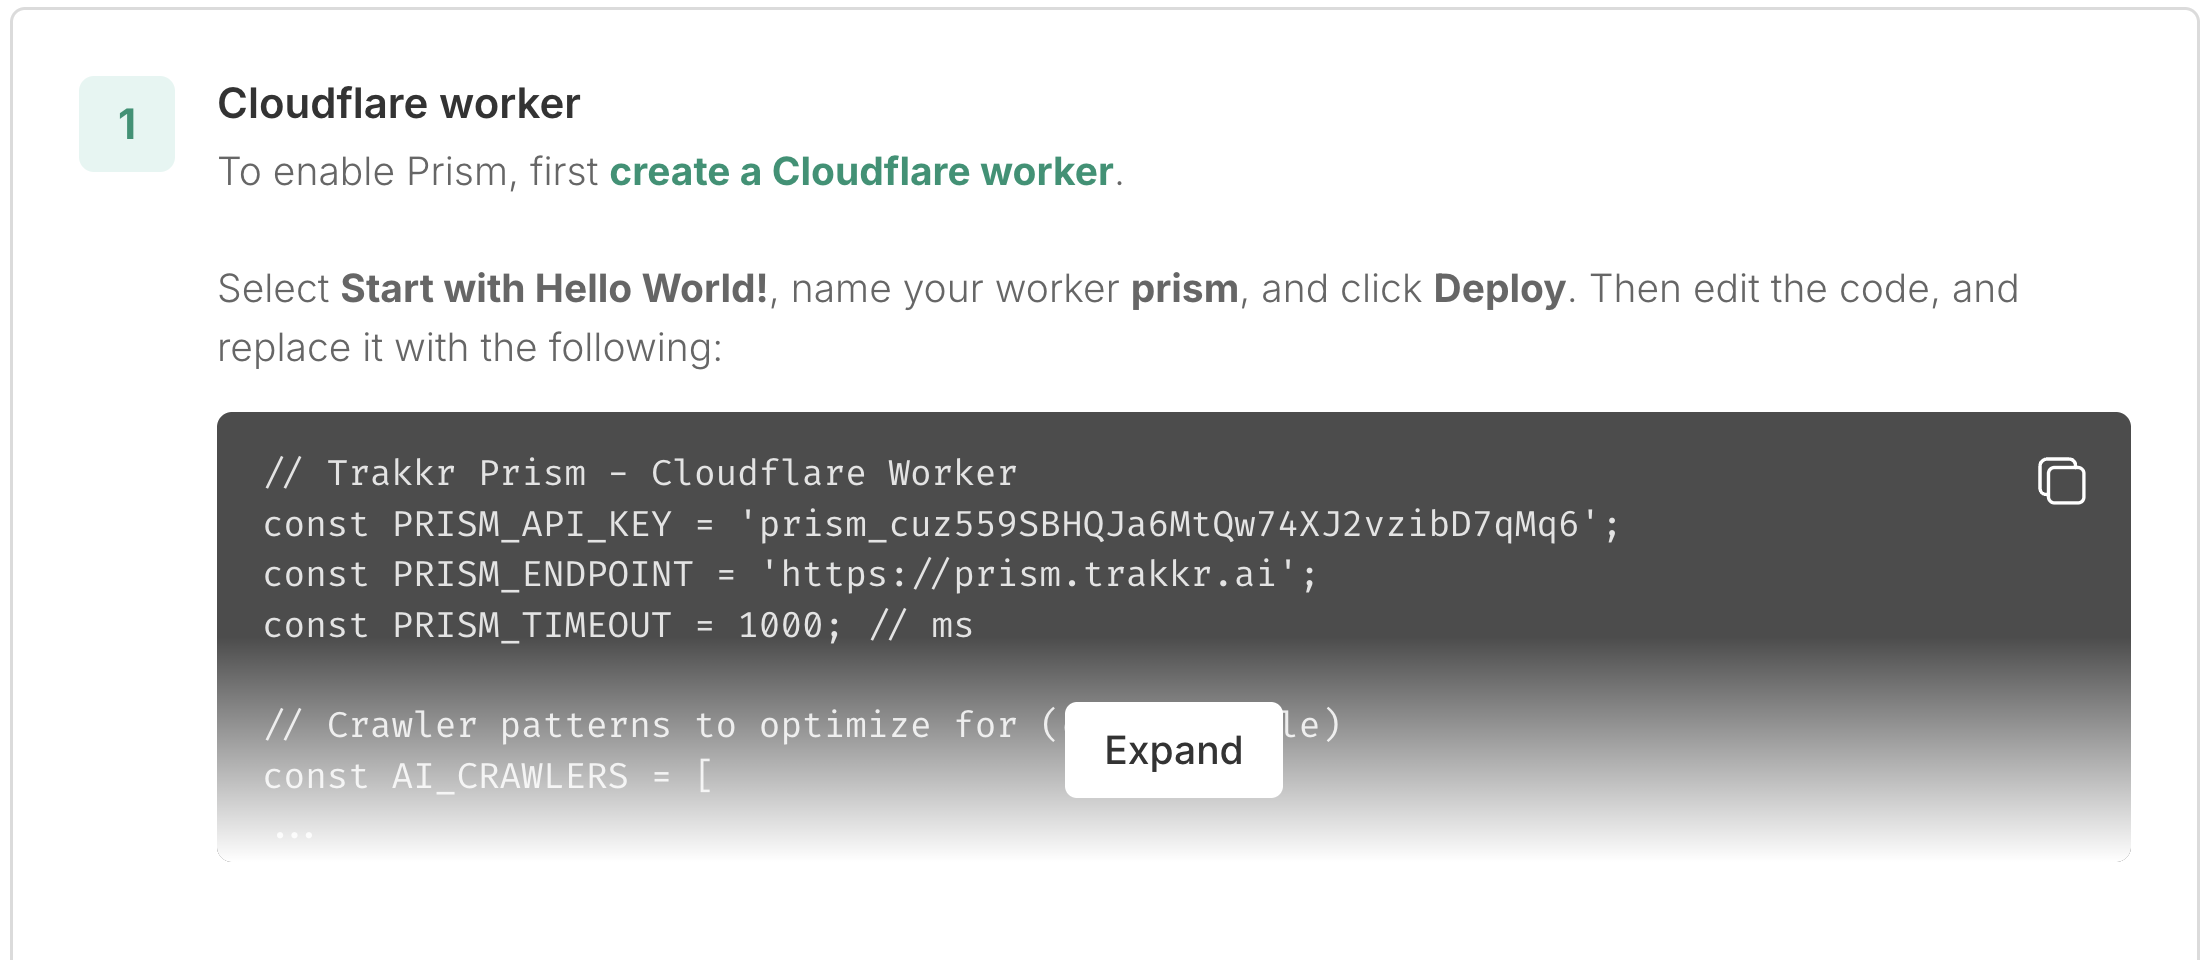

Step 2: Creating a Worker route
Next, head back to your Trakkr tab and scroll down to step 2. You’ll see another green bold link there which you should click on; this will take you to a screen to set up a Worker Route (basically an instruction to put live the worker you just created). Your worker route should be set live at yourdomain/* . So, if your domain is nike.com, your worker route should be set to nike.com/* . Select the worker that you just created (and should be named Prism).
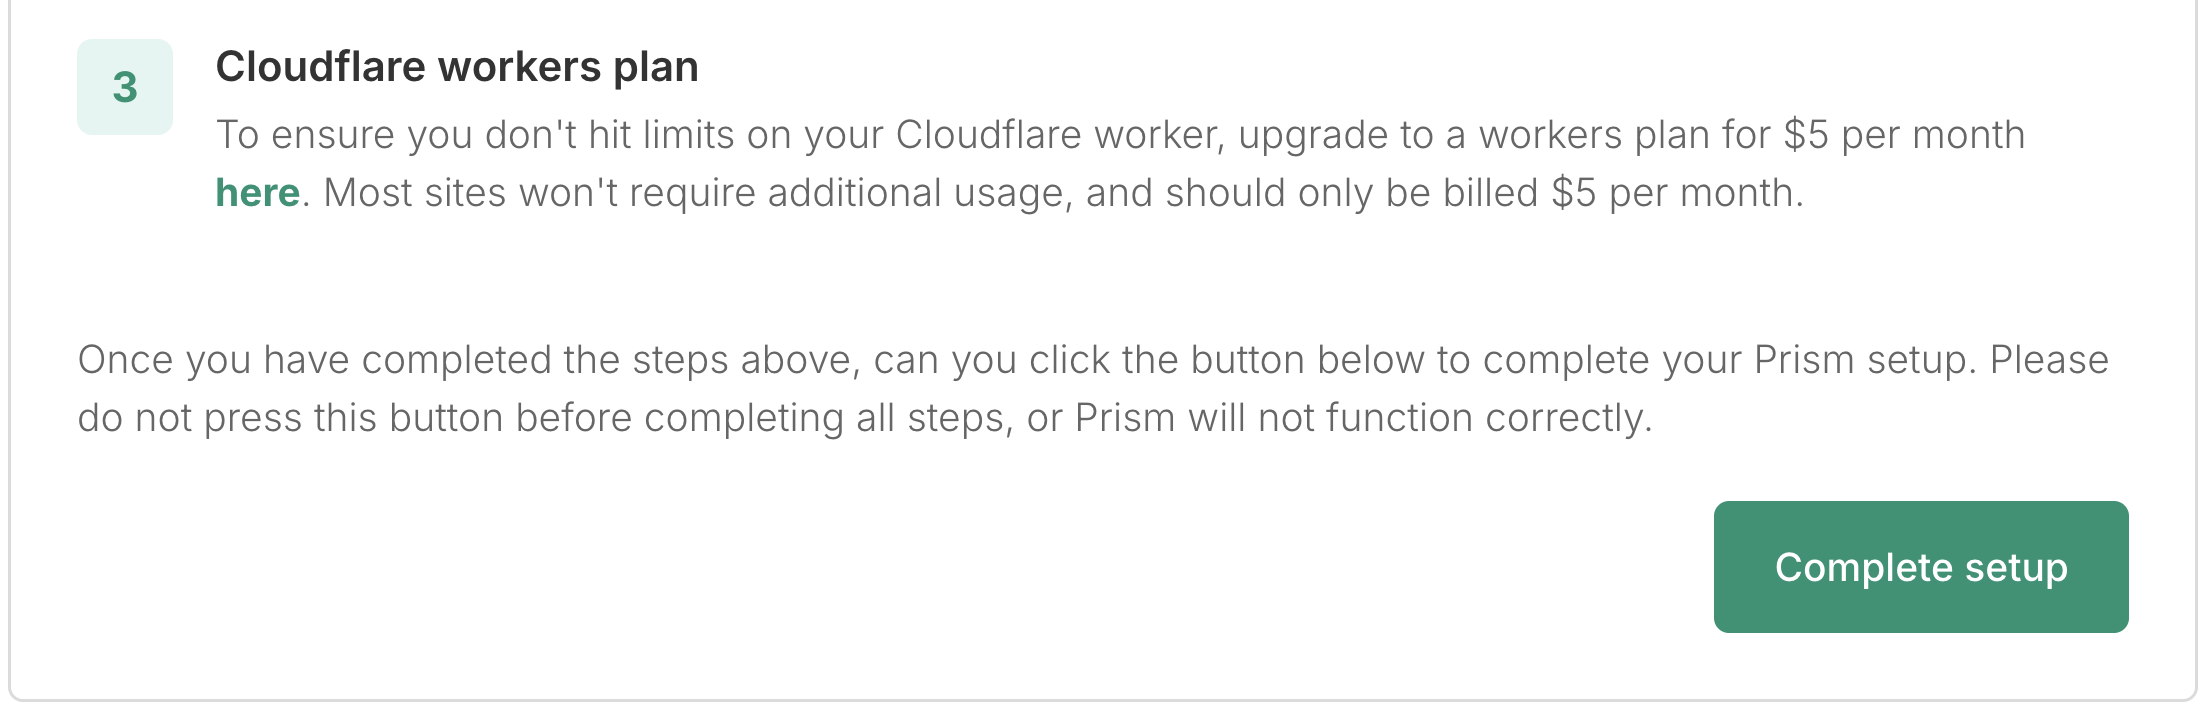
Step 3: Upgrading to a Cloudflare Workers paid plan
All but the very smallest sites will need a Cloudflare Workers paid plan in order to use Prism without bottlenecks. Fortunately, this is only $5 per month. There are additional usage costs, but these are only likely to affect very high volume sites, and come in at around 30 cents per million requests. To upgrade to a Workers paid plan, click the button on step 3 of your Trakkr installation guide.Finishing up
If you’ve completed all the steps above, you’re good to go! Back in your Trakkr setup screen, click the green button to complete your setup. Please make sure that all steps above have been completed by this point however, otherwise Prism will not function.